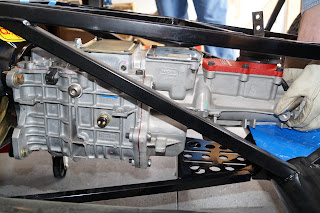
The engine and transmission connected and ready to install.
Adam Kropff, helper extraordinaire. Kate photobombing.
The plan was to lift the engine and transmission and then push the car into place. Rachel's job was to steer and brake. The car wound up being too low and we had to put it on stands and then move the engine.
We should have used the front lift mount to give it a more radical angle. Adam had to push down quite a bit to get the transmission under the firewall.
Four hours and ZERO scratches later.
Tuesday, April 23, 2013
Welding fun and prepping the engine.
These are the braces that I welded up for the passenger's "Oh, Crap!" bar.
With the braces installed and painted. They look like they actually belong there. It wasn't the prettiest welding, but I pushed and pulled on them with everything I had. I thought I was going to pull the car off the jack stands and they did not budge.
This is the spring from the power steering pump piston. The pump is for a fox body Mustang and puts out a little too much pressure for the lighter roadster. Cutting the spring lowers the power steering pressure and makes the car easier to drive.
I welded on a small plate to the clutch pedal stop. The pedal assembly is from a 2004 Mustang. With my setup (having to pull out the stock clutch quadrant) the clutch pedal would be about 5 inches above the brake pedal. This plate lowers the clutch pedal to where I like it.
My engine all dressed up. I installed all the accessories while out of the car to make sure it all fit correctly and to figure out the belt length. I pulled all that stuff back off before the engine install.
It's been a while..... BRAKE LINES!!! (The bane of my existance)
This is a view from the master cylinder. The silver sleeving over the brake line is thermal insulation. The header is going to be only a few inches away in this area. The insulation is supposed to protect up to 2000F radiant heat. I also went with the highest temperature brake fluid I could find.
This is the passenger brake line where it will pass below the radiator.
Brake line running aft. The larger line is the fuel line.
Fuel and brake lines where they pass behind the driver's seat.
Rear brake line passing under the trunk.
Passenger rear line crossing over.
All of the brake lines before final installation. It took me almost 2 months to get these lines the way I wanted them. Most of them I did in one try, but I made a template for EVERY bend I did. Practicing to see exactly where I needed to make the next bend. Just like the fuel line, I found that the third dimension was really frustrating for me. I'm still not 100% sure that they are perfectly leak tight. If I ever talk about building another car, please remind me about the brake and fuel lines.
Subscribe to:
Comments (Atom)


